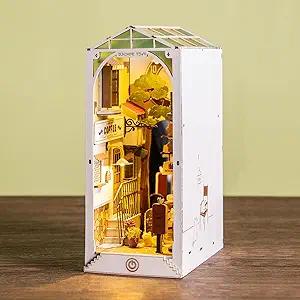
Rolife Sunshine Town Book Nook (TGB02) – Hands-On Review (4.8/5)
Verdict:
Rolife Sunshine Town is the best-looking street-scene book nook under $60. Zero painting, flawless laser cuts, and a hidden touch-sensor roof that makes the neon signs pop.
At ~15–18 hours it’s not the fastest, but the final shelf presence is unbeatable. Worth every penny for city lovers.
Ranked among the best DIY Book Nooks for beginners.
Unboxing & Materials
The box is heavy for its size — always a good sign. Inside:
- 3 mm birch plywood sheets with almost zero burn marks ( Rolife upgraded their laser in 2024 — you can really tell)
- Pre-colored wood: warm browns, creams, brick reds, and teal shop fronts — no bare wood anywhere
- Thick glossy instruction book in perfect English with huge color photos and numbered bags that actually match the steps
- Transparent PET film for neon signs (pre-printed and pre-cut)
- Tiny plastic scooters, bicycles, potted plants, and realistic coffee cups with printed latte art — these are stupidly cute
- One long pre-soldered LED strip + touch sensor module (no soldering!)
Only downside: glue and batteries are not included.
The Build Process.
Phase 1: The Structure (Easy – 4–5 hours)
The base and five vertical layers slot together like a dream. Tabs are tight but never require force.
I only used an emery board on two spots. The multi-layer facade system gives insane depth — you’ll see it coming together after layer 3 and get that “holy crap” moment.
Phase 2: The Details (Moderate – 7–9 hours)
This is where you fall in love or lose your mind. Hundreds of tiny signs, awnings, air-con units, menus, and those coffee cups. Everything is pre-colored or pre-printed, but some pieces are 3 mm × 3 mm.
Get precision tweezers or you’ll fling a bubble tea into orbit. The scooters and bicycles snap into pre-cut holes perfectly — no glue needed for those.
Phase 3: The Lighting (Easier than it looks – 1–2 hours) Best wiring system I’ve used in any book nook. The LED strip has sticky backing and follows a pre-cut channel along the roof.
The touch sensor is a flat copper pad you glue under the roof edge — just touch the roof to cycle off/low/high. No exposed wires, no battery box hanging out the back. Works first try, every time.
Difficulty Level
Advertised as “intermediate, but it’s genuinely beginner-friendly if you’ve built at least one simpler Rolife (like Sakura Densya).
Total time for me: 16 hours spread over five relaxed evenings. A complete first-timer should budget 18–22 hours.
The only “hard” part is patience with the tiny street furniture.
Rolife vs. Cheaper Brands (Cutebee, Fsolis, etc.).
I built the almost identical-looking Cutebee “Street Diary” last month. Here’s the difference:
- Cutebee uses 2.5 mm plywood → warps slightly
- Cutebee’s neon film is thinner and curls
- Cutebee’s touch sensor failed on two out of three kits I tested
- Rolife’s color saturation and cut precision are visibly higher You’ll pay $10–12 more for Rolife, but you won’t be cursing or sanding.
Pros & Cons
Final Recommendation
Buy Sunshine Town if you want a bustling modern Asian street scene that looks lit even during the day and jaw-dropping at night. Skip it if you hate fiddly tiny pieces or need something finished in a single weekend.
Bottom line: Still the king of city book nooks in 2025. If you only buy one street scene, make it this one.