Don't Panic (And DON'T Glue That Roof On Yet!)
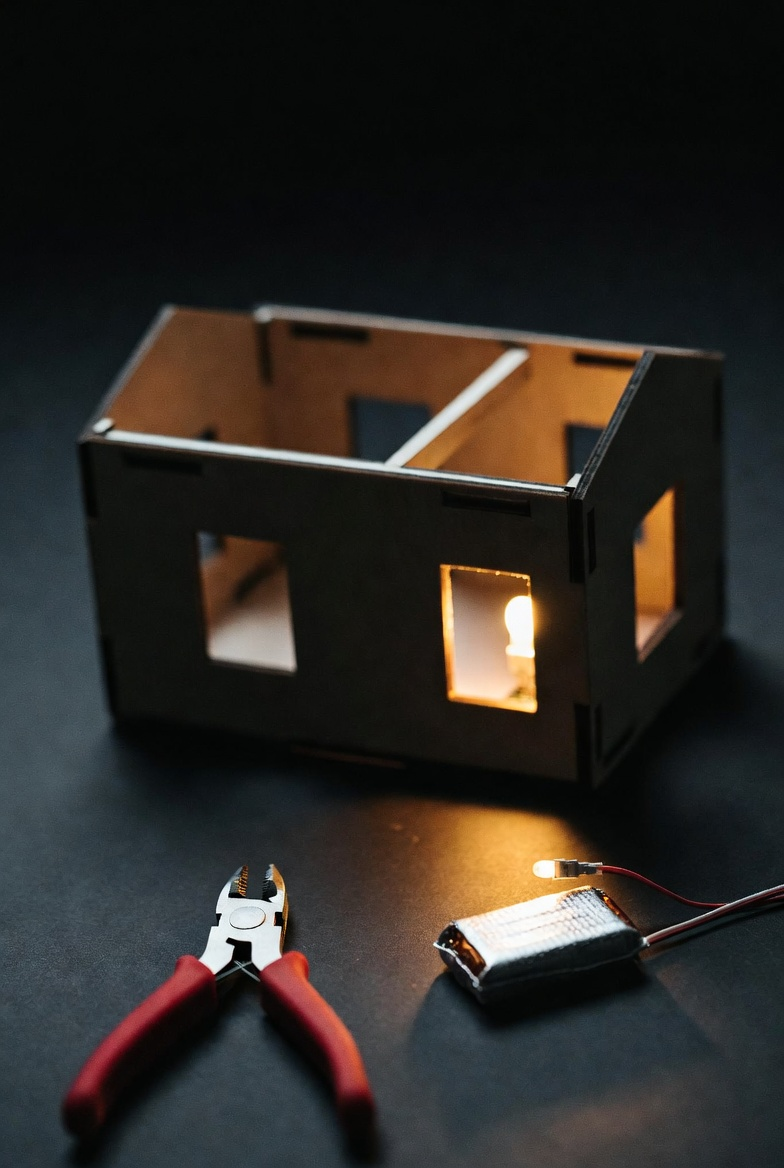
I see you there. You are staring at your beautiful Rolife dollhouse or Cutebee book nook. You are holding your breath. You’ve spent the last three weeks carefully assembling tiny furniture, gluing wallpaper with surgical precision, and threading those delicate, hair-thin LED wires through miniature holes in the walls.
This is the moment. The grand reveal. You flip the switch and...
Nothing.
Complete darkness.
Before you throw the whole kit across the room (please don't—you've worked too hard), take a deep breath. This happens to almost everyone on their first miniature kit. I've been building miniatures for twelve years, and I promise you: 95% of LED problems have nothing to do with broken lights.
They are almost always simple connection issues that take five minutes to fix—once you know the secret rules that the instruction manuals usually leave out.
The good news? You haven't ruined anything. The better news? I'm going to walk you through exactly how to troubleshoot this, step by step, in plain English. No electrical engineering degree required.
One critical rule before we start: If you haven't glued your roof or final walls on yet, DON'T. You need access to those wires. If you have already glued them, grab a flashlight and some tweezers; we might need to do some microsurgery.
The Emergency Toolkit: What You Need
Stop trying to fix this with your fingernails. Grab these tools:
- Fresh Batteries: Don't trust the ones you found in a drawer.
- Sandpaper (220 grit): Or a nail file.
- Electrical Tape: Black stretchy tape (Scotch tape is not safe).
- Scissors/Wire Strippers.
- (Optional but helpful): A Lighter.
Step 1: Check the Batteries (The "Is It Plugged In?" Phase)
I know this feels obvious, and you might be tempted to skip this section. Do not skip this section. In my experience troubleshooting with students, the battery is the culprit 40% of the time.
The Hidden Sticker Problem Most miniature kits use CR2032 coin batteries (the flat silver discs). If you bought these new, or if they came with the kit, flip them over.
- Look closely: Is there a clear plastic sticker or a colored tab on one side?
- The Fix: This is an insulation barrier meant to keep the battery fresh during shipping. It is often invisible. Peel it off completely. If even a tiny scrap of adhesive remains, it blocks the current.
The "Upside-Down" Mistake Coin batteries are not like AA batteries where the "bumps" make it obvious. They have a flat top and a flat bottom.
- Positive (+): The smooth, shiny side with writing on it.
- Negative (-): The textured, bumpy side.
- The Rule: Look at your battery box. Usually, the Positive (+) side faces UP (toward you). If you put them in smooth-side-down, the circuit is reversed.
The "Loose Spring" Issue Cheap battery boxes sometimes have loose springs. Put the batteries in and wiggle them. Does the light flicker? If so, the battery isn't making tight contact.
- The Fix: Take the batteries out. Use a small screwdriver or your fingernail to gently bend the metal prongs inward so they squeeze the battery tighter.
Step 2: The Wire Insulation Problem (The "Liar" Wires)
Here is the secret that causes the most rage-quits in this hobby: Those pretty copper-colored wires in your kit are LIARS.
The Invisible Coating Almost every miniature kit uses enameled copper wire. This is wire coated with a micro-thin layer of clear plastic or varnish insulation.
- The Problem: You can't see it. The wire looks like bare, shiny metal.
- The Result: If you twist two "coated" wires together, you are just rubbing two pieces of plastic together. No electricity flows. It’s like trying to shake hands while wearing rubber gloves.
How to Strip Enameled Wire (Three Methods) You need to remove about half an inch of this coating from every wire end before connecting them.
Method A: The Sandpaper (Safest)
- Fold a piece of 220-grit sandpaper in half.
- Sandwich the wire tip inside the fold.
- Pull the wire through gently.
- Rotate the wire and repeat 4-5 times.
- Result: The wire will turn from "shiny copper" to a duller, lighter pink/silver color. That means the metal is exposed.
Method B: The Craft Knife (Fastest)
- Lay the wire flat on a cutting mat.
- Hold your X-Acto knife at a shallow angle (like you are shaving a carrot).
- Gently scrape the coating off all sides.
- Warning: Don't press too hard, or you will slice the wire off.
Method C: The Lighter Trick (Pro Tip)
- Hold the wire end away from anything flammable.
- Briefly flick a lighter flame under the tip for 1 second.
- You will see a tiny puff of smoke as the enamel burns off.
- Crucial Step: Wipe the blackened soot off with your fingers or sandpaper. If you leave the soot, it blocks the connection.
The Tongue Test (Yes, Really) How do you know if you stripped enough? Touch the wire to the tip of your tongue.
- Tastes like nothing/plastic? Keep stripping.
- Tastes metallic/sharp? You have bare metal. You are ready to connect.
Step 3: LED Polarity—The Backwards Wire Problem.
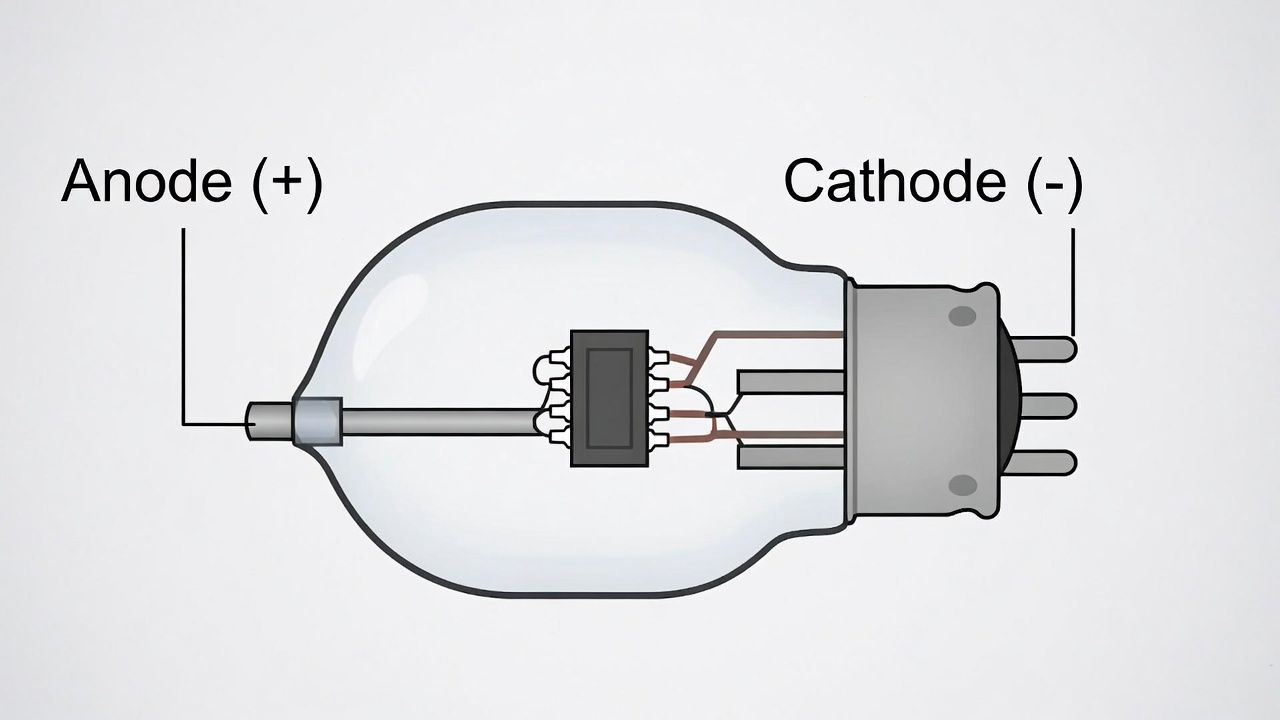
LEDs are not like the lightbulbs in your house. An incandescent bulb lights up no matter which way electricity flows. LED (Light Emitting Diode) only works one way. It is a one-way street for electricity.
Identifying Positive and Negative Every LED has two legs:
- Long Leg: This is the Anode (+). It must connect to the Red Wire.
- Short Leg: This is the Cathode (-). It must connect to the Black Wire.
"Help! I already cut the legs off!" If you trimmed the legs to fit them in the house, you can still tell:
- Look inside the glass bulb of the LED.
- You will see two metal shapes.
- The Smaller metal piece is Positive (+).
- The Larger metal piece (looks like a flag) is Negative (-).
The Color Code Most battery boxes follow this standard:
- Red Wire = Positive (+)
- Black/White Wire = Negative (-)
The Fix: If you twisted Red to Short-Leg, you have reversed the polarity. The light won't break, it just won't turn on. Untwist, swap the wires, and re-twist.
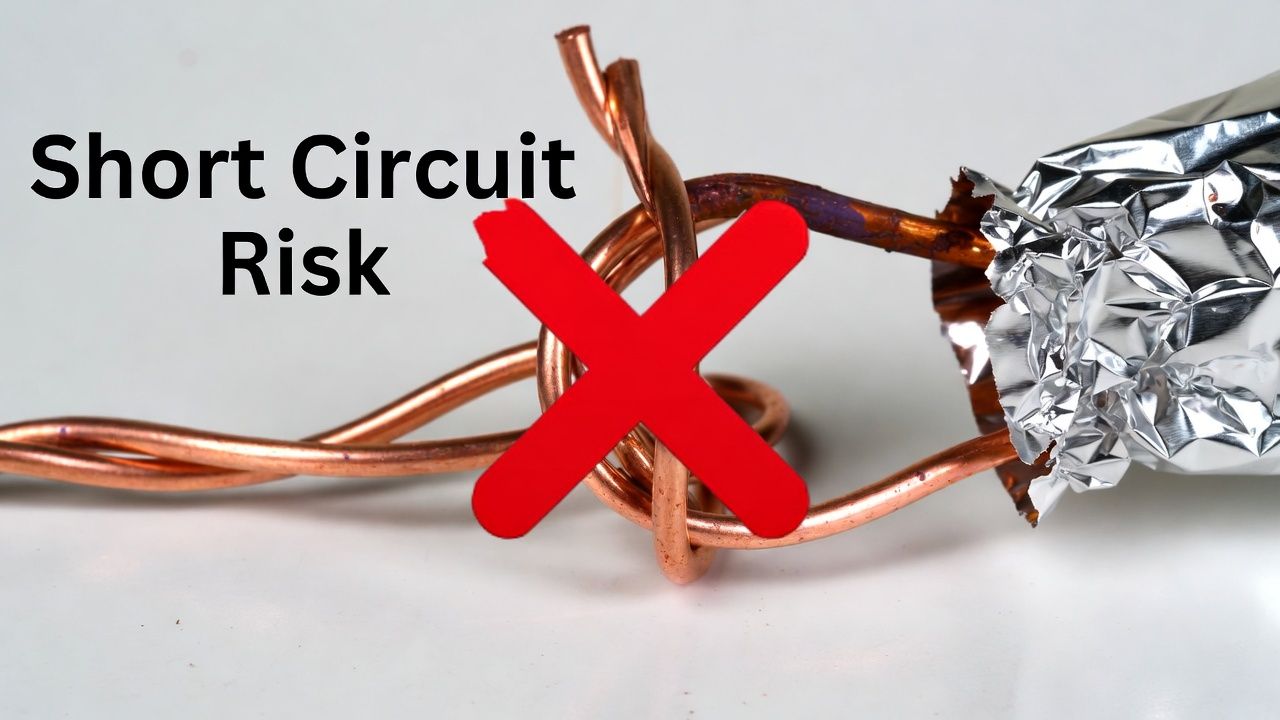
Step 4: The Short Circuit (When Wires Kiss).
A "Short Circuit" sounds dangerous. In a 3-volt miniature kit, it won't start a fire, but it will kill your battery and stop the lights from working.
What is it? A short happens when the electricity finds a shortcut back to the battery without going through the light bulb first. This usually happens when:
- Touching Wires: The bare copper of the Red wire touches the bare copper of the Black wire.
- Touching Metal: A bare wire touches a metal part of the kit (like a foil mirror, a metal chair, or the brass casing of the battery box).
The Diagnostic Test
- Turn the switch ON.
- Wait 30 seconds.
- Touch the battery box. Is it getting warm?
- If the batteries feel hot, you have a short circuit. Turn it off immediately to save the battery.
The Fix: Inspect every single connection. Are there stray strands of copper sticking out? Wrap every twisted connection in Electrical Tape or Heat Shrink Tubing. No bare metal should ever be visible.
Step 5: The Twist-and-Tape Technique (Doing It Right)
Bad wiring is the cause of flickering lights. Don't just wrap one wire loosely around the other. Use the "Western Union Splice" method (simplified):
- Strip: Ensure both wires have 1 inch of bare metal exposed.
- Cross: Cross them to form an "X" about halfway down the exposed metal.
- Twist Both: Twist both wires around each other simultaneously. Don't just wrap one around the straight other.
- Tighten: You want 5-6 tight spirals. Give it a gentle tug. If it pulls apart, it was too loose.
- Seal: Wrap tightly with electrical tape.
Step 6: Advanced Troubleshooting (The "Nuclear Option")
If you have done Steps 1-5 and it is still dark, we have to rule out broken parts.
Test the Switch (Bypass Method) Sometimes, the cheap switch on the battery box is broken inside.
- Cut the wires leading from the battery box (leave enough room to reconnect them later).
- Strip the ends coming directly from the batteries.
- Touch them directly to the LED wires.
- Result: If the light turns on now, your switch was broken. You need a new battery box (available on Amazon for $6).
Is the LED Burnt Out? It is rare, but LEDs can burn out if they receive too much voltage.
- Did you try to test the LED with a 9-volt battery? If so, you blew the bulb. It is dead forever. You need to replace the LED.
- Did you use the included 3-volt battery box? The LED is likely fine.
The Series vs. Parallel Problem
- Parallel Wiring (Good): All red wires go to the main red; all black wires go to the main black. If one light breaks, the others stay on.
- Series Wiring (Bad): The wire goes from Light A -> Light B -> Light C. If Light A breaks, all of them go out (like old Christmas lights).
- Check: Most kits use Parallel. Check your twists. Are all the reds gathered in one big bundle? That is correct.
Final Checklist: Run Through This Before Giving Up
Before you glue that roof on, verify:
- [ ] Batteries: Stickers removed, fresh, installed correct side up?
- [ ] Insulation: Did you scrape/sand every single wire end until it tasted metallic?
- [ ] Polarity: Is Red connected to the Long Leg (+)?
- [ ] Shorts: Are any bare wires touching each other?
- [ ] Switch: Is it actually ON?
Conclusion: You Are Now an Electrician
I know this is frustrating. You wanted to be an interior designer, and suddenly you are an electrical engineer.
But here is the truth: This is the skill level up.
The next kit you build? You won't panic. You'll grab your sandpaper, strip those "liar" wires, check the polarity, and tape it up like a pro. And when you flip that switch and the warm glow fills your tiny library or garden, it will feel ten times more satisfying because you fixed it.
Now go scrape those wires and light up your tiny world.
Read Also: How to Light Up Your Book Nook: A Beginner’s Guide to Hiding Wires.
