You've built two miniature kits. You followed the instructions perfectly. You glued every piece exactly where the manual said to glue it. You wired the lights. You placed the paper plants in their designated spots.
And when you finished, you looked at your completed build and thought... "This looks exactly like the picture on the box. And kind of... plastic."
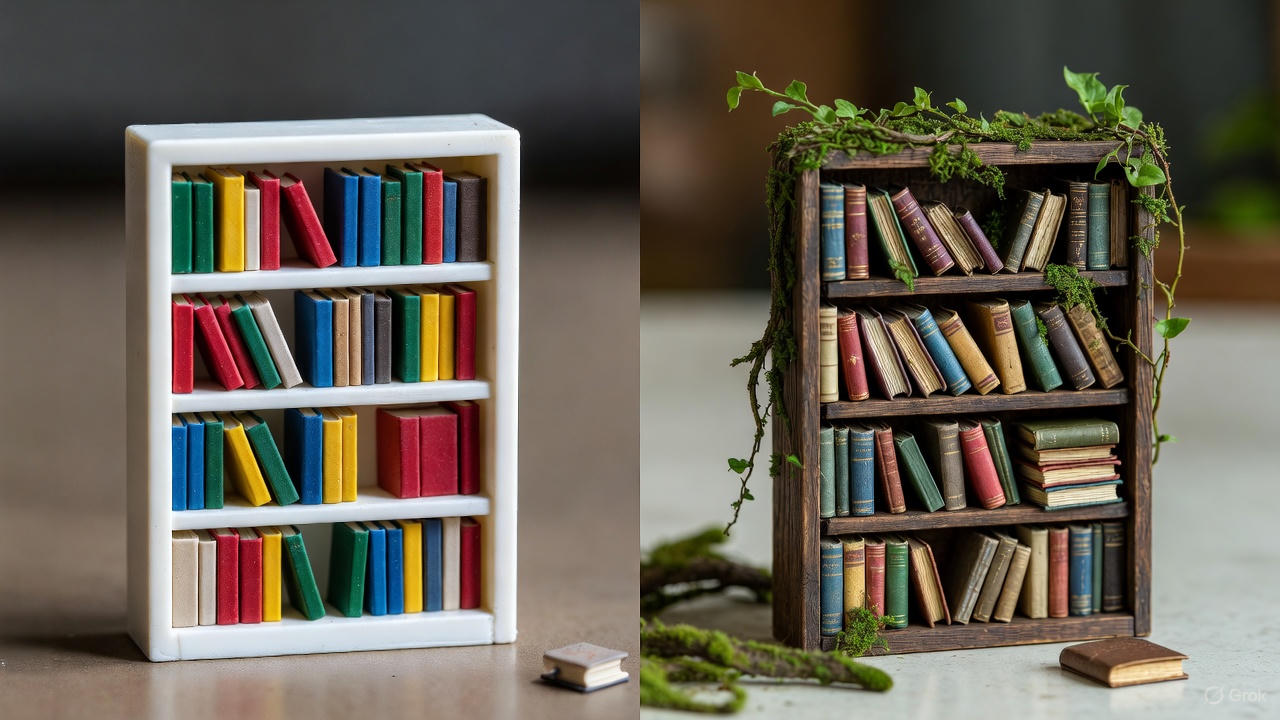
You're right. Stock miniature kits—even expensive ones from Rolife, Robotime, or Hands Craft—look mass-produced.
The wood is too clean. The paper plants are too flat. The lights are too stark. Everything is too perfect, which paradoxically makes it feel fake.
Real spaces aren't perfect. Real wood has stains and weathering. Real plants have depth and texture. Real books have worn covers. Real rooms have clutter—a coffee cup someone forgot, an open book, a blanket draped over a chair.
This is where kitbashing comes in.
Kitbashing is the art of taking a commercial kit and making it yours. You're not just assembling someone else's design—you're transforming it into something unique.
You add materials from outside the kit: model railroad scenery, craft paints, scraps of fabric, printed images.
You age the wood. You replace the fake plants with realistic moss. You add details that tell a story.
And here's the rebellious truth: The moment you customize your first kit, you'll never want to build "by the book" again.
This guide will teach you five simple customization techniques that take your builds from "fresh out of the factory" to "this looks like it's been sitting in someone's attic for 80 years."
The Toolkit: What You Need.
You don't need a full artist's studio. Here's what I keep on hand for customization:
- Paints: Acrylic craft paint (brown, black, white) – $1-2 per bottle.
- Finishes: Matte varnish spray (Krylon or Mod Podge) to kill the plastic shine.
- Scenery: Reindeer moss and Static grass (Model railroad section).
- Tools: Fine-tip brushes, tweezers, and a printer.
Total startup cost: $20-30. Most of these supplies last through dozens of builds.
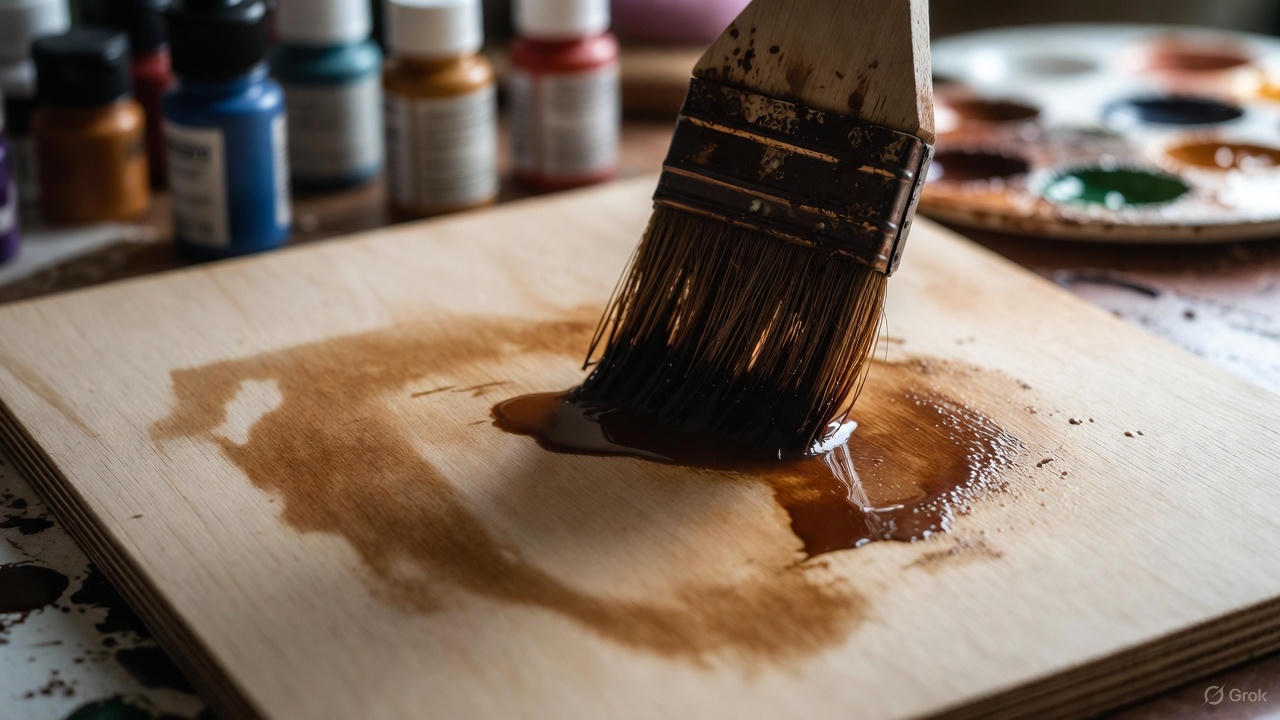
Technique 1: The Acrylic Wash (Aging Wood).
The Problem: Fresh laser-cut wood is pale, uniform, and looks like it came out of a factory yesterday. It has no depth.
The Fix: This is the single most impactful customization you can do. An acrylic wash darkens the wood, settles into the laser-cut grooves, and creates the illusion of age.
- Mix the wash: Combine 1 part acrylic paint (Burnt Umber or Black) with 4 parts water. It should look like dirty water.
- Test it: Brush it onto a piece of scrap wood from the kit.
- Apply: Brush the wash over the entire wall or floor.
- Wipe it off: Immediately (within 30 seconds), wipe the surface with a paper towel.
Why this works: The paint stays in the cracks and wood grain (shadows) but wipes off the flat surface (highlights). It mimics 50 years of aging in 5 minutes.
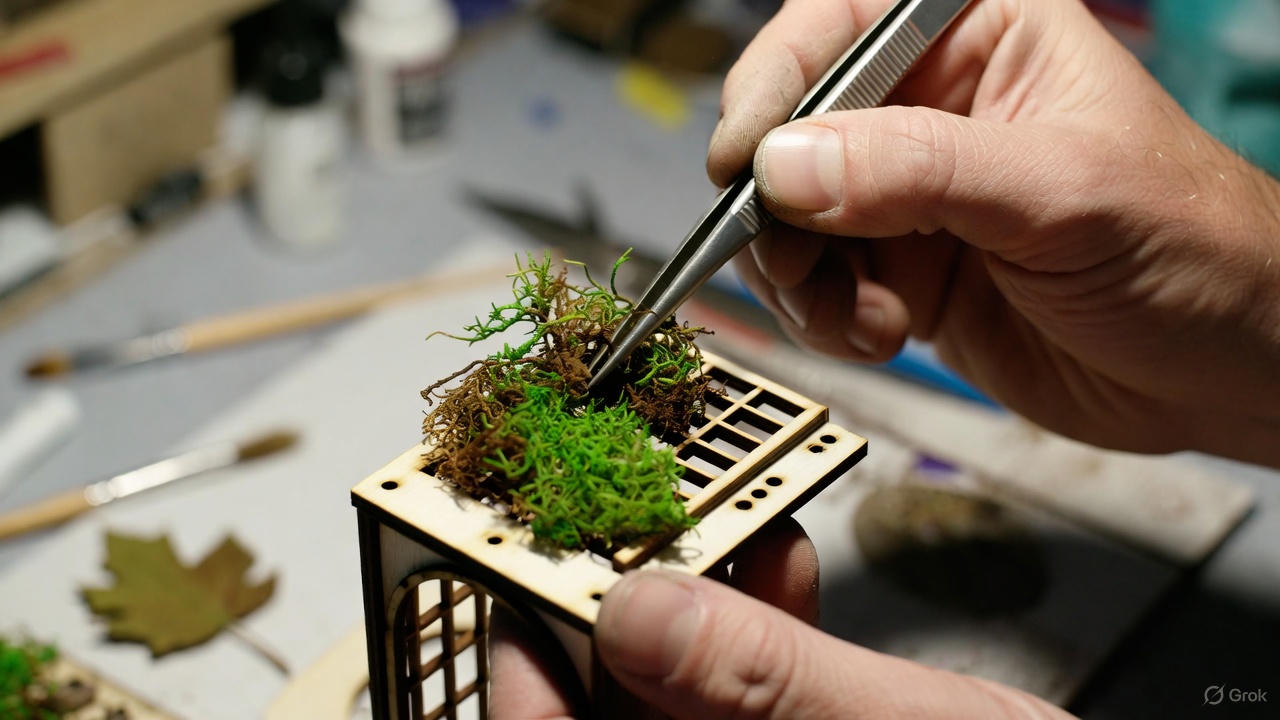
Technique 2: The "Greenery Swap" (Realistic Plants).
The Problem: Miniature kits include paper plants—flat, 2D cutouts that look like clip art. They scream "I'm fake!"
The Fix: Replace them with Dried Moss or Static Grass.
- Tear: Pull off pea-sized clumps of Reindeer moss.
- Glue: Dab Tacky Glue onto the paper stem or pot.
- Place: Press the moss into the glue with tweezers.
Pro Tip: Mix different shades (dark green + light green) to simulate real growth. For autumn scenes, use orange or burgundy moss.
Technique 3: Custom Book Covers (Personalization).
The Problem: Miniature kits come with generic books labeled "History," "Dictionary," or "Encyclopedia."
The Fix: Print your own covers.
- Find images: Google the covers of your favorite books (e.g., Harry Potter, Stephen King, Jane Austen).
- Resize: Paste them into Microsoft Word and shrink them to 0.6–0.9 inches tall.
- Print: Use Regular Printer Paper, not glossy photo paper. Real books aren't glossy; standard paper has the perfect matte texture.
- Glue: Wrap them around the kit's book blocks.
I once built a library kit for my mom and replaced all the tiny book covers with her favorite Stephen King novels. I just Googled the covers, shrank them, and glued them over the generic ones. It made her cry when she saw it.
Technique 4: Lighting Gels (Creating Mood).
The Problem: Most kit LEDs are "cool white" (5000K), which looks like a hospital waiting room. Real homes use warm lighting.
The Fix: Tint the bulbs.
- Method: Paint the LED bulb with a thin layer of translucent yellow or orange acrylic paint.
- Hack: You can even color over the bulb with a yellow Sharpie highlighter.
Why this works: It changes the light temperature to a cozy "candlelight" glow (3000K) that makes the room feel inhabited and warm.
Technique 5: Adding "Clutter" (Storytelling).
The Problem: Stock miniature kits are too clean. No one lives there. It's a museum, not a home.
The Fix: Add life.
- The "In Progress" Look: Leave a book open on the desk. Place a coffee cup (made of clay or a bead) next to it.
- Textiles: Drape a scrap of fabric over a chair to look like a messy blanket.
- Stains: Use a tiny brush to add a coffee ring stain to a table using your brown wash.
Pro Tip: Less is more. Three or four messy details make the room feel alive. Too many looks like a trash heap.
Conclusion
The best part of this hobby isn't finishing the manual; it's the moment you go off-script.
The kit is just the foundation. The customization is where you leave your mark. Five years from now, you won't remember which kits you built "by the book."
You'll remember the library where you painted the walls deep burgundy and aged the wood until it looked 200 years old.
So forget the manual. Grab your paints and your moss. Look at the kit sitting on your desk and ask yourself: What story do I want to tell?
Need a full guide on Miniature House? Check here
