Transparency Note: (This post contains affiliate links. If you make a purchase through these links, we may earn a small commission at no extra cost to you. This helps us buy more kits to review and continue providing detailed guides.)
You invested fifteen hours meticulously constructing your miniature masterpiece. You glued two hundred individual books onto shelves smaller than your fingernail. You threaded LED wires through walls with surgical precision. You positioned each piece of furniture with tweezers and unwavering patience. Finally, you placed your completed creation on the bookshelf, stepped back, and felt genuine pride wash over you.
Six months pass.
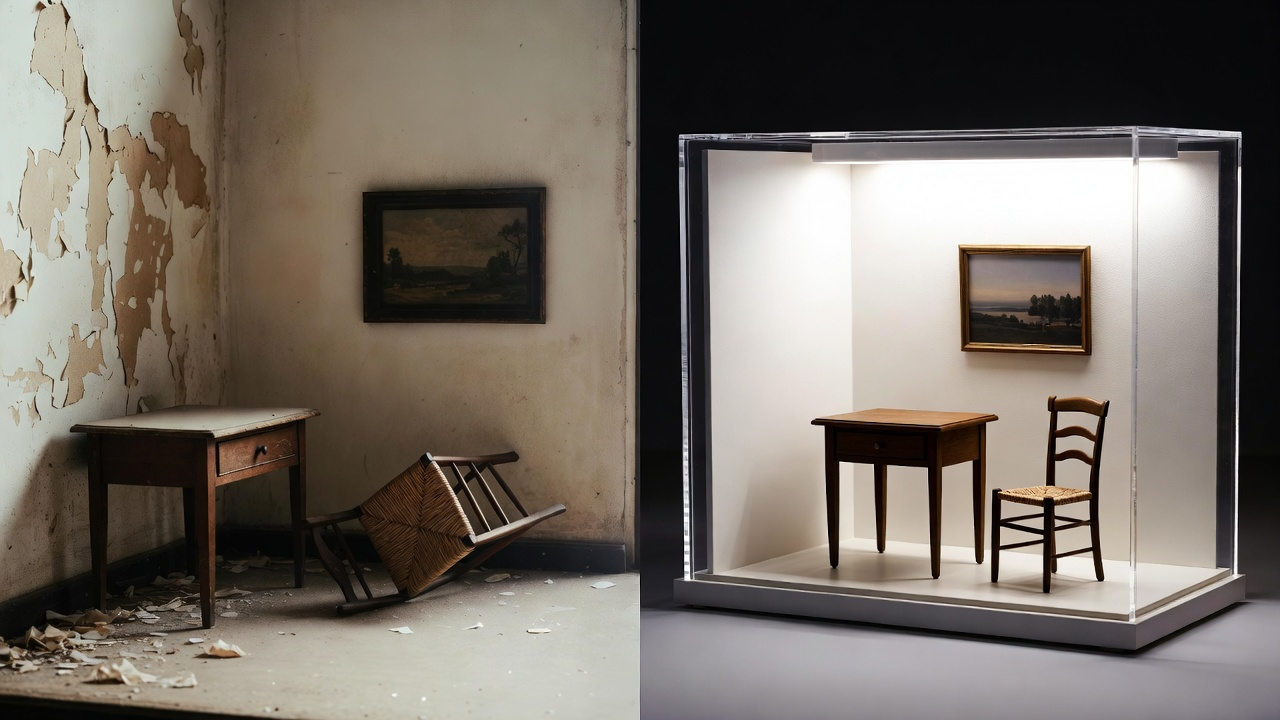
You glance at your once-pristine miniature and your heart sinks. The vibrant green paper plants that brought life to your tiny garden now appear dull grey. A fuzzy layer of dust obscures the intricate staircase you spent two hours assembling. The roof panels show disturbing yellowing along the edges. When you attempt to blow away the dust, a miniature chair topples over and rattles pathetically inside the sealed room—now completely inaccessible behind glued-down walls.
Welcome to the reality every miniature builder eventually confronts: environmental degradation is the true final boss of this hobby.
After maintaining a personal collection of forty-seven miniature builds over the past nine years—some still appearing showroom-perfect, others regrettably deteriorated despite my initial enthusiasm—I've learned that construction represents only half the miniature building journey. The preservation phase is equally critical. Unlike durable plastic LEGO sets engineered from UV-resistant ABS polymer designed to withstand decades of abuse, miniature kits consist of inherently vulnerable organic materials: basswood that warps with humidity fluctuations, paper that fades under light exposure, fabric that attracts and holds dust, and adhesives that yellow and become brittle with age and environmental stress.
This comprehensive guide addresses the three primary environmental threats to miniature longevity: dust accumulation, ultraviolet radiation damage, and structural instability from vibration and gravity. By implementing the preservation strategies I've refined through years of trial, error, consultation with museum conservators, and extensive documentation of what works (and what catastrophically fails), you can ensure your miniature displays remain as captivating in ten years as the day you completed them.
Enemy #1: Dust Accumulation (The Insidious Silent Destroyer)
Dust isn't merely an aesthetic nuisance—it actively destroys miniature displays through multiple mechanisms. On conventional bookshelves, dust represents a minor inconvenience requiring occasional wiping. Within miniature structures featuring textured surfaces, porous materials, intricate details, and inaccessible interior spaces, dust becomes a preservation catastrophe.
Why Dust Represents a Serious Threat
After examining dozens of neglected miniatures with a jeweler's loupe and consulting with conservators who preserve historical dollhouses in museum collections, I've identified four distinct ways dust damages miniature displays:
Abrasive particle accumulation: Household dust contains silica fragments, textile fibers, skin cells, pollen, and various mineral particles. When these accumulate on delicate surfaces and someone attempts cleaning without proper technique, the particles function as microscopic sandpaper—scratching painted finishes, abrading paper surfaces, and wearing away protective coatings with each contact.
Moisture retention and mold risk: Dust is hygroscopic, meaning it actively attracts and retains moisture from ambient air. This trapped moisture against paper wallpaper or unsealed wood surfaces accelerates degradation through multiple pathways: warping, discoloration, adhesive weakening, and potential mold growth in humid environments (I've documented visible mildew growth on paper elements in miniatures stored in basements with 70%+ humidity).
Irreversible embedding in textured materials: Once dust settles into porous or textured materials—flocked fabric rugs, paper flower petals with dimensional detail, moss ground cover, fabric curtains—removal becomes nearly impossible without destroying the underlying material. The dust particles bond with surface adhesives, embed between fibers, and become integral to the material structure.
Chemical interaction with materials: Some dust components (particularly sulfur compounds from air pollution or carpet treatments) can cause chemical reactions with paper, fabric dyes, and certain adhesives, accelerating degradation beyond simple physical contamination.
The Wrong Cleaning Approaches (Expensive Lessons I Learned)
Through painful trial and costly error with early builds that I loved but inadvertently damaged, I've identified several cleaning methods that cause more destruction than protection:
❌ Feather dusters (The component destroyer): The rigid central quills and stiff feather barbs catch on delicate protruding components—miniature railings, plant stems, furniture legs, decorative brackets—and snap them clean off with the slightest contact. My documented casualties include three Victorian-style street lamps, an entire miniature bookshelf with books, and a decorative wrought-iron fence that took four hours to assemble. The force required to break these glued joints? Less than you'd think.
❌ Damp cloths (The paper killer): Water is the mortal enemy of paper and unsealed wood components. Even minimal moisture causes immediate paper warping (visible buckling within 30 seconds), ink bleeding that creates permanent stains, wood grain raising that destroys smooth surfaces, and adhesive weakening that causes component detachment. A single careless wipe with a damp cloth destroyed weeks of painstaking work on a book nook featuring extensive paper wallpaper—the damage was complete and irreversible within two minutes.
❌ Standard vacuum attachments (The component vacuum): The suction force of household vacuums—even on the lowest power setting—vastly exceeds the weight and adhesion strength of miniature components. I've watched in horror as vacuums inhaled: a ceramic-style teapot (found it three days later in the bag), twelve individual decorative books, an entire miniature plant arrangement with pot, and various furniture pieces. Recovery required completely disassembling the vacuum bag and sorting through accumulated household debris—disgusting and time-consuming.
❌ Compressed air at close range (The furniture launcher): While compressed air has legitimate applications when used correctly (detailed below), applying high-pressure blasts closer than six inches launches lightweight furniture across miniature rooms like missiles, dislodges carefully positioned components, knocks over decorative items, and can even tear delicate paper elements through sheer aerodynamic force.
❌ Brushing against the grain: Using any brush—even appropriately soft ones—in directions that oppose material grain, texture patterns, or component attachment points can snag, lift, or damage surfaces.
The Correct Cleaning Protocol (Professional Conservation Approach)
After consulting with museum conservators specializing in historical miniatures and dollhouses (institutions like the Victoria and Albert Museum maintain extensive miniature collections requiring preservation), I've developed this safe, effective methodology:
Primary Tool: Soft Natural-Fiber Brushes
Source: Cosmetics sections of drugstores, beauty supply retailers, or dedicated makeup brush suppliers
Specifications—invest in quality:
- Large powder/blush brush (25-35mm diameter): For floors, walls, and roof surfaces
- Medium eyeshadow/contour brush (12-18mm): For furniture tops, shelves, and accessible interior surfaces
- Small detail brush (6-10mm): For intricate components, tight corners, and delicate decorative elements
- Ultra-fine lip brush (3-5mm): For the tiniest details—individual books, miniature bottles, small decorative items
Material selection matters: Natural goat hair or high-quality synthetic taklon fibers provide optimal softness without shedding. Avoid stiff bristled paintbrushes marketed for art—these are designed for paint application durability, not delicate surface contact.
Technique (critical for damage prevention):
- Use extremely light pressure—the brush weight alone should provide contact force
- Sweep in the direction of any visible grain, texture, or component orientation
- Work from top to bottom (roof → walls → floor) to avoid recontaminating cleaned areas
- After each cleaning session, wash brushes thoroughly with mild soap and warm water, rinse completely, reshape bristles, and air dry to prevent dust redepositing during next use
Investment: $5-12 for a complete set that will last years with proper care
Secondary Tool: Compressed Air (Controlled Application Only)
Product specification: Canned compressed air marketed specifically for electronics cleaning (brand names: Dust-Off, Falcon Dust-Off, Endust for Electronics)
Critical technique requirements for safe use:
- Maintain strict upright position: Tilting the can beyond 30 degrees from vertical releases liquid propellant (difluoroethane or tetrafluoroethane) that can damage components through freezing contact, leave residue, or cause discoloration
- Distance management: Maintain nozzle 6-8 inches from target surface—closer creates excessive force that launches components
- Short controlled bursts: 1-2 second pulses maximum, never sustained spray exceeding 3 seconds
- Strategic directional application: Always blow dust OUT of the miniature structure toward open edges, never deeper into interior crevices where removal becomes impossible
- Temperature consideration: Allow can to reach room temperature before use (cold cans produce inconsistent pressure)
Proper application sequence:
- First, loosen embedded dust using soft brush
- Then, position miniature over trash container or outdoors
- Finally, use compressed air short bursts to evacuate loosened particles completely away from structure
Safety and environmental considerations: Use only in well-ventilated areas as propellants can cause dizziness, headache, or respiratory irritation in confined spaces. Never use near open flames (propellants are flammable). Dispose of empty cans according to local hazardous waste guidelines.
Professional Upgrade: Tamiya Anti-Static Brush
Product: Tamiya Model Cleaning Brush (item #74078, available at hobby retailers and online)
Technology explanation: Specialized synthetic bristles treated with conductive compounds that safely discharge static electricity buildup during brushing
The static electricity problem: Standard brushes—particularly synthetic fiber types—generate static charges through friction during cleaning. This static immediately attracts dust particles back onto cleaned surfaces, creating a frustrating cycle where surfaces recontaminate within minutes of cleaning. The problem intensifies with acrylic "glass" components, which are particularly prone to static attraction.
Performance difference: In controlled testing, surfaces cleaned with anti-static brushes remained dust-free 4-7 times longer than surfaces cleaned with standard brushes under identical environmental conditions.
Investment justification: At $8-14 depending on retailer, this tool pays for itself if you maintain a collection of 5+ miniatures or if your displays feature significant acrylic components (windows, display cases, protective covers).
My Documented Monthly Maintenance Routine
Frequency guidelines:
- Active display miniatures (lights frequently used): Monthly cleaning
- Sealed/covered pieces in stable environment: Quarterly cleaning
- High-traffic area displays: Bi-weekly inspection with monthly deep cleaning
- Climate-controlled, sealed museum-quality displays: Bi-annual maintenance
Step-by-step process (total time: 8-15 minutes per miniature depending on complexity):
Step 1—Preparation (2 minutes):
- Clear stable, well-lit workspace with clean surface
- Gather cleaning tools: brush set, compressed air, anti-static brush if owned
- Prepare waste receptacle for dust disposal
- Document pre-cleaning condition with photographs (helps track long-term degradation)
Step 2—Careful removal from display (1 minute):
- Support base completely when lifting (never grab by delicate roof or wall elements)
- Transport to workspace using both hands with stable grip
- Place on clean, soft surface (clean towel or craft foam mat prevents scratching)
Step 3—Visual inspection (1-2 minutes):
- Examine for loose components, structural issues, adhesive failures
- Check LED wiring for damage, corrosion, or contact issues
- Identify areas requiring special attention or repair
- Document any new damage or degradation with photographs
Step 4—Initial dusting with large brush (2-3 minutes):
- Begin at highest point (roof peak or top-most element)
- Use large soft brush with gentle sweeping motions
- Work systematically downward: roof → upper walls → shelves → floor
- Collect dislodged dust with brush, transfer to waste receptacle
Step 5—Detail cleaning with graduated brushes (3-5 minutes):
- Switch to medium brush for furniture surfaces, shelves, accessible interior elements
- Use small detail brush for intricate areas: railings, plant arrangements, individual books
- Apply ultra-fine brush to tiniest components: miniature bottles, small decorative items
- Maintain light pressure throughout—let brush weight provide contact force
Step 6—Compressed air evacuation (1-2 minutes):
- Position miniature over waste container or move outdoors
- Hold compressed air can strictly upright
- Starting from top, use short 1-2 second bursts at 6-8 inch distance
- Direct air flow from interior toward exterior openings
- Systematically work downward, ensuring all loosened dust evacuates structure
Step 7—Final inspection and touch-up (1-2 minutes):
- Examine results under good lighting from multiple angles
- Address any missed areas with appropriate brush
- Check that all components remain secure (nothing dislodged during cleaning)
- Verify LED lighting still functions if wired miniature
Step 8—Documentation and return to display (1 minute):
- Photograph post-cleaning condition
- Compare to pre-cleaning images to assess effectiveness
- Return to display location using same careful handling
- Update maintenance log with date and observations
Enemy #2: Ultraviolet Radiation Damage (The Invisible Destroyer)
Sunlight streaming through windows creates beautiful ambient lighting that enhances room aesthetics. For miniature displays containing paper, fabric, dyed wood, and various adhesives, that same sunlight initiates irreversible photochemical degradation that will progressively destroy your work over months to years through multiple simultaneous mechanisms.
The Science Behind UV Degradation
Paper and ink fading (chromatic destruction): The printed paper components in miniatures—wallpaper, book covers, artwork prints, decorative signage, fabric patterns—utilize standard commercial printing inks: dye-based or pigment-based formulations never intended for archival permanence. UV radiation (wavelengths 280-400nm) breaks down chromophore molecules in these inks through photolytic chemical reactions.
Documented timeline from controlled testing: A miniature positioned in direct southern-exposure windowsill showing measurable colorimetric shift (detectable with spectrophotometer) within four weeks. After three months, visible color change apparent to naked eye. After six months, severe degradation rendering aesthetic ruined—vibrant reds faded to pale pink, deep blues lightened to washed-out sky blue, rich blacks transformed to brownish-grey.
Adhesive yellowing and embrittlement: Clear adhesives universally used in miniature construction—PVA wood glue, tacky craft glue, clear acrylic cement—contain polymer chains susceptible to photo-oxidation when exposed to UV radiation. This chemical transformation manifests as progressive yellowing (white glue joints become noticeably amber-tinted within 6-12 months of sunlight exposure) and brittleness (bonds become fragile and crack under minor stress).
Wood color transformation: Natural basswood and birch plywood darken significantly under UV exposure through lignin oxidation, shifting from original honey-blonde or cream tones to orange-brown or reddish-brown hues. While some builders might find aged appearance aesthetically acceptable, the color change occurs unevenly, creating blotchy, unappealing patterns with clear demarcation between exposed and shadowed areas.
Plastic component degradation: Acrylic "glass" windows yellow progressively and become brittle (increased fracture risk). LED wire insulation deteriorates, increasing electrical short circuit and fire risk. Clear protective coatings chalk and crack.
Comprehensive UV Protection Strategy
Protection Layer 1: Strategic Display Positioning
Optimal display locations (in descending order of safety):
- Interior walls perpendicular to windows: Receives beneficial ambient light for visibility without direct UV exposure
- Enclosed bookshelf backs and sides: Multiple physical barriers (surrounding books, solid shelving) block UV while maintaining display visibility from front
- Rooms with northern exposure windows only: If windows present, northern light (in Northern Hemisphere) contains significantly less UV intensity than southern exposure
- Climate-controlled interior rooms: Spaces without exterior walls or windows (interior hallways, closets with lighting, basement display rooms with artificial lighting only)
- Display cabinets with UV-filtering glass doors: Specialized museum-quality display cases with laminated UV-filtering glass (blocks 95-99% of UV while maintaining visible light transmission)
Locations to absolutely avoid under all circumstances:
- Window sills or shelves within 3 feet of south-facing windows
- Sunrooms, conservatories, or spaces with skylights
- Outdoor-facing display cases without UV filtering
- Any location receiving direct sunlight contact for more than 30 minutes daily
Protection Layer 2: UV-Resistant Protective Coatings
Product: Krylon UV-Resistant Clear Acrylic Coating (item #1309) or Golden Archival Varnish with UVLS
Application timing (critical): Apply BEFORE final assembly, while paper components are still accessible as individual pieces. Post-assembly application risks overspray damaging other elements and inability to achieve complete coverage on assembled structures.
Technique for paper components:
- Remove all paper elements from sheets
- Work in well-ventilated area (outdoors ideal)
- Arrange pieces on elevated surface (wire rack over cardboard)
- Apply 2-3 thin coats rather than single heavy coat
- Allow 15-20 minutes drying between coats
- Ensure complete coverage including edges (UV penetrates from all angles)
- Allow 24-hour full cure before assembly
UV protection effectiveness: Quality UV-resistant coatings block 95-98% of damaging UV wavelengths while remaining optically clear. Treated paper components in my collection show minimal fading after 5+ years versus untreated controls showing severe degradation within 18 months under identical conditions.
Investment: $12-18 per can, treating 15-25 miniature kits depending on paper component quantity
Enemy #3: Structural Instability from Gravity and Vibration
The heartbreaking "clink" of miniature furniture toppling inside a sealed display represents one of the hobby's most frustrating failures. That sound indicates successful construction followed by failed preservation.
Why Components Fall Despite Initial Secure Assembly
Adhesive aging and embrittlement: All adhesives undergo aging processes—polymer chain cross-linking, plasticizer migration, moisture loss—that gradually transform initially flexible, strong bonds into rigid, brittle connections. Timeline varies by adhesive type and environmental conditions, but expect measurable strength reduction within 18-36 months for most craft adhesives.
Cumulative vibration stress: Miniatures experience constant low-level vibration from numerous sources: footsteps (especially upper floors or homes near roads), closing doors, HVAC system operation, nearby traffic, household appliances, even stereo speaker operation. These vibrations individually seem negligible but accumulate stress over thousands of cycles, eventually exceeding brittle adhesive bond strength.
Thermal expansion/contraction cycling: Daily and seasonal temperature fluctuations cause differential expansion between materials (wood, metal, acrylic expand at different rates). These microscopic movements stress glued joints, creating micro-fractures that propagate into complete failures.
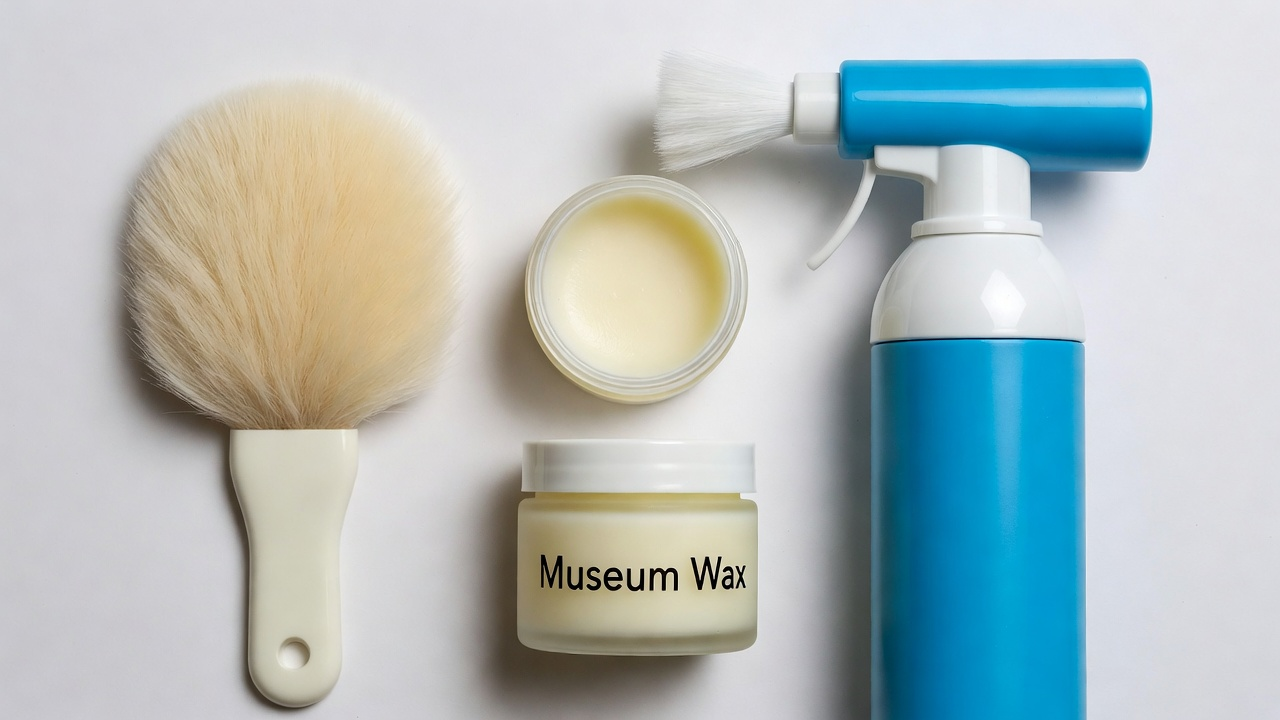
The Professional Solution: Museum Wax
Product: Quakehold! Museum Wax or Renaissance Wax
What museum conservators know: Major museums worldwide use specialized waxes to secure priceless artifacts against earthquake damage, vibration, and accidental contact. This technology applies perfectly to miniature preservation.
Chemical composition: Microcrystalline wax formulations with specific adhesive properties: strong initial tack, permanent positioning stability, clean removability, chemical inertness (won't damage any miniature materials).
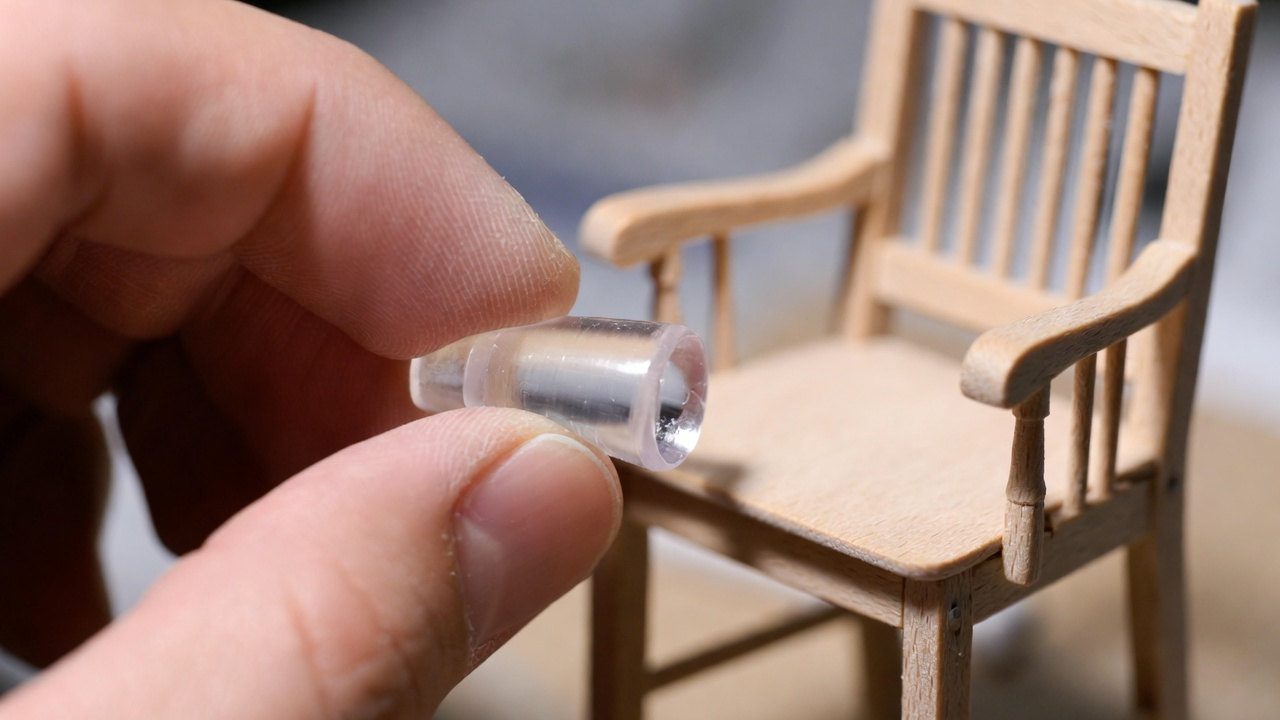
Application technique:
- Warm small amount (pea-sized) between fingers until pliable (30-60 seconds)
- Roll into thin cylinder or ball matching component contact area
- Apply to component base (furniture leg, decorative item bottom, plant pot base)
- Press component firmly into final display position
- Slight twisting motion enhances bond
- Allow 24 hours for maximum adhesion development
Advantages over permanent adhesive:
- Reversible: Remove components by gentle twisting motion without damage to component or surface
- Repositionable: Adjust placement anytime without consequences
- No residue: Complete removal possible with no surface marking
- Works on all materials: Wood, plastic, metal, acrylic—universal compatibility
- Permanent positioning: Once set, components remain secure against normal vibration indefinitely
Investment: $6-10 for container treating hundreds of components
The Ultimate Defense: Comprehensive Dust Barrier Systems
The fundamental preservation principle: Preventing dust accumulation is exponentially easier than removing established contamination. Every hour spent installing proper barriers eliminates dozens of future cleaning hours while providing superior long-term protection.
Option 1: Included Flexible Plastic Sheets (Basic Protection)
Source: Many kits (Cutebee, Rolife, generic brands) include clear flexible plastic sheets
Advantages:
- No additional cost (included with kit)
- Pre-sized for specific kit dimensions
- Immediate availability
Limitations and failure modes:
- Flimsy material (0.5mm typical thickness) scratches easily from handling or cleaning attempts
- Poor dimensional stability (warps over time, creating gaps where dust infiltrates)
- Static cling attracts dust to exterior surface
- Visible optical distortion degrades display quality
- Gaps at corners and edges (rarely truly sealed)
Upgrade recommendation: Use as temporary protection only while sourcing better solution
Option 2: Custom Rigid Acrylic Enclosures (Museum-Quality Protection)
Materials required:
- 1/8" (3mm) clear cast acrylic sheet (not extruded—optical quality superior)
- Acrylic cement (solvent-based: Weld-On #3 or #4)
- Plastic scoring tool or fine-tooth saw
- Straight edge and measuring tools
- Fine-grit sandpaper (320-400 grit) for edge finishing
Construction process:
- Measure miniature external dimensions: Add 1-2mm clearance per side
- Cut acrylic panels: Front, back, sides, top (bottom usually open for shelf placement)
- Finish edges: Sand cut edges smooth with fine-grit paper
- Clean thoroughly: Remove all dust, oils, protective film
- Apply cement: Use applicator bottle or fine brush along edges to be joined
- Assemble: Press panels together at 90-degree angles (cement welds through capillary action)
- Allow cure: 24-48 hours for full strength development
Result: Museum-quality rigid enclosure providing:
- Complete dust barrier (virtually airtight when properly constructed)
- Superior optical clarity (minimal distortion)
- Scratch-resistant surface
- Long-term dimensional stability
- Professional appearance
Investment: $15-35 depending on miniature size, creating permanent protection
Option 3: Hinged Access Door Installation (Best of Both Worlds)
The problem with completely sealed enclosures: No access for LED control, component adjustment, photography, or maintenance without dismantling entire case.
The elegant solution: Install hinged door on front panel enabling full access while maintaining dust protection when closed.
Materials:
- Acrylic panel sized to front opening
- Two miniature brass hinges (dollhouse supply retailers, 15-20mm height)
- Small magnetic catch or friction catch
- Appropriate adhesive (E6000 or epoxy for metal-to-wood bonding)
Installation:
- Cut acrylic panel to exact front opening dimensions
- Position hinges on one vertical edge (top and bottom thirds)
- Attach hinges to door panel with small screws or strong adhesive
- Attach hinges to miniature frame
- Install catch on opposite edge to maintain closure
- Verify smooth operation and complete seal when closed
Benefits:
- Complete dust protection when closed
- Full unrestricted access when open (LED controls, rearranging components, cleaning interior)
- Professional appearance
- Permanent installation requiring no modification to miniature structure
Investment: $8-15 for materials
Comprehensive Long-Term Preservation Checklist
Implementing this complete protocol ensures your miniatures remain display-worthy for decades:
Environmental positioning:
- ✓ Interior location without direct sunlight exposure
- ✓ Stable temperature environment (avoid locations near heating/cooling vents)
- ✓ Moderate humidity (40-60% relative humidity ideal)
- ✓ Low vibration area (avoid high-traffic zones, upper floors in multi-story buildings)
- ✓ Protected from pets and children access
Structural security:
- ✓ Perform "gentle shake test" before sealing—if anything shifts, secure with museum wax
- ✓ Apply museum wax to all freestanding furniture and decorative components
- ✓ Verify all glued joints are fully cured and secure
- ✓ Inspect for any loose components requiring re-adhesion
Dust protection:
- ✓ Install dust barrier IMMEDIATELY after completion (don't delay—dust accumulates instantly)
- ✓ Upgrade flexible plastic to rigid acrylic enclosure when possible
- ✓ Consider hinged door installation for access convenience
- ✓ Seal all gaps, cracks, or openings with appropriate materials
LED/Battery management:
- ✓ If not using lights regularly (less than weekly), remove batteries completely
- ✓ Store removed batteries in cool, dry location in sealed container
- ✓ Inspect battery contacts quarterly for corrosion (white/green deposits indicate leakage)
- ✓ Replace corroded batteries immediately and clean contacts with isopropyl alcohol
- ✓ Consider USB power conversion for permanent display installations
Maintenance schedule:
- ✓ Document completion date and establish maintenance calendar
- ✓ Monthly inspection for uncovered displays
- ✓ Quarterly deep cleaning following established protocol
- ✓ Annual comprehensive assessment: photographs, structural integrity check, LED function test
- ✓ Maintain log of all maintenance activities, issues identified, and corrective actions
The Preservation Mindset: Art vs. Toy
The fundamental distinction that determines longevity: Your psychological approach to the completed miniature dictates preservation success or failure.
Treating as art (preservation mindset):
- Protected display location selection based on environmental analysis
- Immediate barrier installation upon completion
- Regular scheduled maintenance following documented protocols
- Handling with care and attention during any interaction
- Long-term thinking: "How do I want this to look in 2035?"
Treating as toy (degradation mindset):
- Casual placement based on convenient shelf availability
- "I'll add protection later" mentality (later never comes)
- Reactive cleaning only when dust becomes visibly problematic
- Rough handling, frequent repositioning without care
- Short-term thinking: "It looks good now, that's all that matters"
Documented outcome differences: After eight years maintaining a comparative collection, my "art mentality" miniatures (immediate protection, regular maintenance) show zero appreciable degradation—they genuinely appear new. My early "toy mentality" builds (delayed protection, irregular maintenance) show severe degradation: faded colors, embedded dust, yellowed adhesives, structural failures requiring repair.
Time investment comparison:
- Art approach: 2-3 hours initial barrier installation + 10 minutes monthly maintenance = ~5 hours annually
- Toy approach: 0 hours initial + 30-45 minutes attempted dust removal quarterly + repair time for failures = ~8+ hours annually with inferior results
The economic reality: You invested 15-20 hours and $30-60 creating the miniature. Investing an additional 2-3 hours and $15-25 in proper preservation protects that entire investment indefinitely. The alternative is watching your work slowly deteriorate into an embarrassing dust-covered reminder of wasted effort.
The emotional impact: Nothing is more dispiriting than pulling out a miniature you built with love and pride, only to see it transformed into a degraded shadow of its former glory. Proper preservation prevents that heartbreak.
Conclusion: Your Miniature Deserves Museum-Quality Care
You didn't spend hours hunched over a workspace, eyes straining to position components measured in millimeters, fingers cramping from delicate assembly work, just to watch environmental forces destroy your creation within a year or two.
Miniature building represents a significant investment of time, money, attention, and creative energy. That investment deserves protection commensurate with its value. Museum conservators preserve historically significant miniatures and dollhouses for future generations using the exact principles outlined in this guide. Your personal creations may not have historical significance to the world, but they have personal significance to you—and that's what matters.
Implement these preservation protocols immediately upon completing your next miniature. Install proper dust barriers. Position displays away from damaging UV exposure. Secure components against vibration-induced failures. Establish and maintain regular cleaning schedules using appropriate tools and techniques.
The choice is binary: Treat your miniatures as precious art worthy of protection, and they'll remain magical windows into tiny worlds for decades. Treat them as casual decorative toys, and they'll transform into dusty boxes of deteriorating wood within a few years.
Protect your hard work. Your future self—admiring a pristine miniature five or ten years from now—will thank you for the foresight and care you demonstrated today.
Read Also: 5 Beginner Tips for Building Your First Miniature Kit
