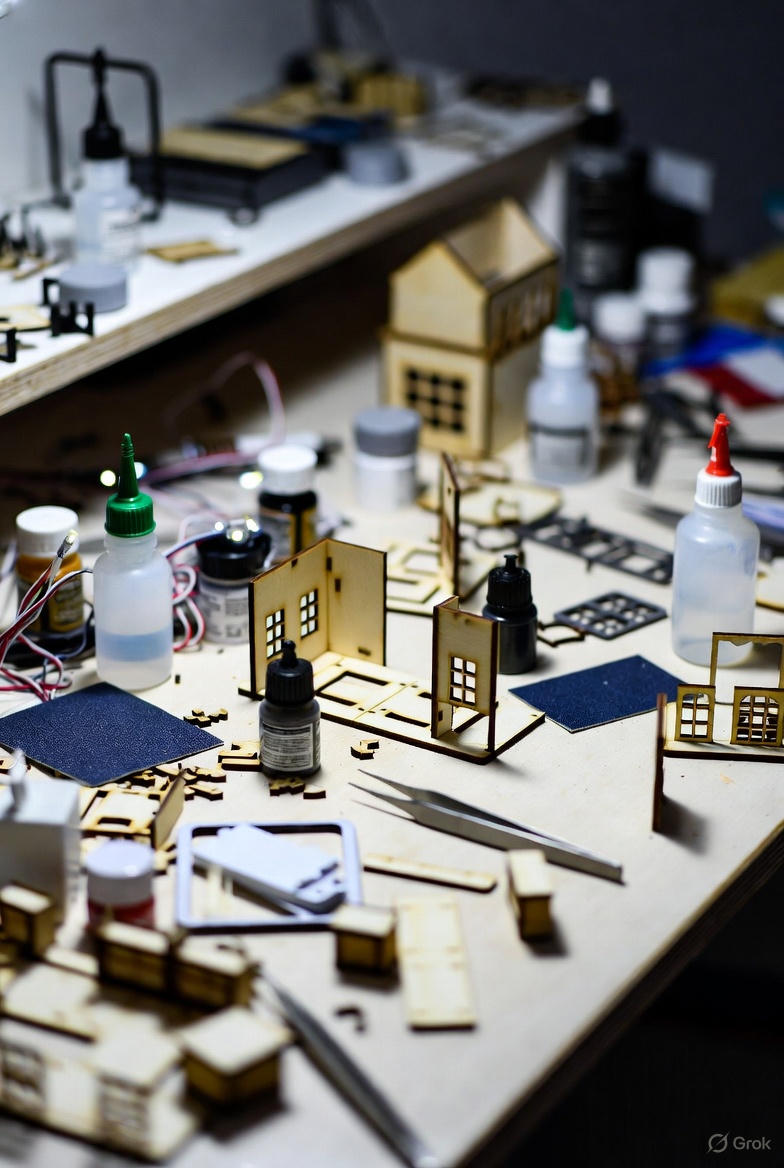
I remember the first time I cracked open a Rolife miniature house kit—my hands were practically shaking as hundreds of tiny laser-cut pieces spilled out onto my table. That fresh, earthy smell of plywood hit me like a wave, mixed with the faint scent of glue packets.
If you're an absolute beginner staring at your first DIY book nook or Robotime model, feeling intimidated is totally normal. It's like being handed a puzzle with no picture on the box, right?
But trust me, after over a decade of building these intricate worlds, I've learned it's not about rushing to the finish line. It's a marathon of patience and small victories. That satisfying "snap" when a piece fits just right? It'll become your favorite sound.
In this guide, I'll share five essential tips to ease you in, drawing from my own trial-and-error journeys.
Tip 1: The "Dry Fit" Rule.
As a seasoned builder, I always start with what I call the "dry fit" rule: assemble every section without a drop of glue first.
Grab your precision tweezers—I recommend the ESD-15 model for their anti-static tips that won't scratch delicate parts—and gently slot the pieces together like a 3D puzzle. Feel the wood's smooth edges as they interlock; it's almost meditative. This step lets you spot any misalignments early, perhaps due to a slightly warped piece from humidity.
Why bother? Because gluing prematurely is a rookie mistake I've made (and regretted). If you don't dry fit, you might end up with crooked walls or doors that won't close, forcing you to pry things apart and risk snapping fragile tabs.
Tip 2: Glue Management.
Glue can make or break your build—literally. I swear by the "toothpick method" for precise application: dip a wooden toothpick into your glue, then dab a tiny amount onto the joint. This prevents those dreaded overflows that cloud up windows or stick pieces where they shouldn't.
For glue choices, skip the watery white glue often included in the box; it seeps everywhere and takes forever to dry clear. Instead, go for Aleene’s Tacky Glue—it's thicker, grabs faster, and dries flexible without yellowing.
Pro Tip: Compare that to super glue like CA (cyanoacrylate), which sets in seconds but can be brittle and fog plastic parts if you're not careful.
Tip 3: Sanding is Non-Negotiable.
Those little "nubs" or tabs left from the laser-cutting process? They're the bane of beginners, but handling them right transforms your build.
I always grab a set of fine-grit sandpaper (220-400 grit) or even a nail file for tight spots. Gently sand in circular motions, feeling the rough edges smooth out under your fingers. For stubborn nubs, use flush cutters like the Xuron 410—they snip cleanly without splintering.
If you skip sanding, those nubs prevent parts from sitting flush, leading to gaps in your structure that scream "amateur." I've seen walls buckle or paint chip off uneven surfaces simply because of a tiny unsanded nub.
Tip 4: Lighting & Wiring.
Adding LED lights brings your miniature to life, but those tiny wires are fragile—treat them like delicate threads.
I use precision tweezers to guide them through holes, twisting gently without pulling. Test the circuit first by touching the battery contacts; you'll hear a faint click as the lights flicker on, casting a warm glow that makes the whole room feel magical.
Warning: Don't strip the wires too aggressively. Use a hobby knife for a shallow cut to avoid nicking the copper inside. I once snapped a wire mid-build and rewiring a glued section is a nightmare—I had to disassemble the entire library just to fix it!
Tip 5: The "Walk Away" Rule.
Building miniatures isn't just physical—it's mental. My "walk away" rule: When your hands start shaking from fatigue or frustration hits, stop.
Step back, brew some tea, and let the glue dry or your mind reset. I've pushed through tired sessions only to glue fingers together or misplace a piece, turning excitement into stress.
In my years with Robotime models, I've learned breaks spark creativity—come back with fresh eyes, and problems often solve themselves.
Verdict: Your first miniature kit is about the journey, not perfection. Embrace the smells, sounds, and even the sticky moments—they're part of the magic.
You've got this—I promise.
