You've built wooden miniature houses. You've mastered glue, you understand how laser-cut pieces fit together, and you've wired LED lights without setting anything on fire.
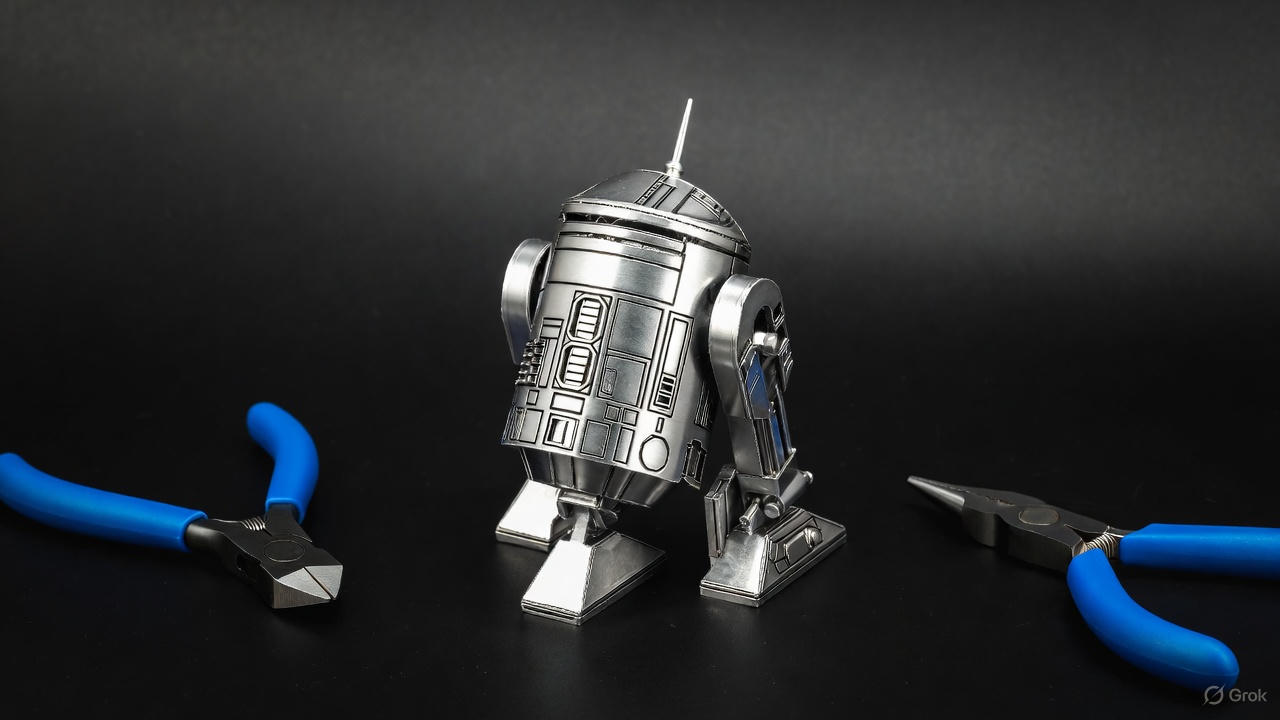
You're scrolling through Amazon and you see them: 3D metal puzzles—intricate models of the Eiffel Tower, Star Wars ships, vintage motorcycles, all made from photo-etched stainless steel sheets that gleam like jewelry.
They look incredible. They also look terrifying.
The pieces are razor-sharp. The instructions show mysterious symbols—circles, triangles, dotted lines—that don't match anything you've seen in wooden kits. There's no glue. The tabs are tiny. One wrong bend and the metal snaps.
Let me stop you right there.
Metal models are different from wood. Completely different. But they're not harder—they're just a different skill set. Wood is forgiving: you can sand mistakes, re-glue joints, and hide errors with paint. Metal is unforgiving: every bend is permanent.
But that precision is also what makes metal models so satisfying. When you finish, you're holding a gleaming, permanent sculpture.
I've built over 40 metal models in the past five years—everything from simple Metal Earth bridges to 500-piece Piececool dragons. I've learned every mistake you're about to make, and I'm going to save you from most of them.
This guide will teach you the three core skills of metal modeling: the cut, the connection, and the shaping.
How Metal Models Differ from Wood
If you're coming from wooden miniature kits, here's what changes:
- No Glue. Ever. Metal models use tabs and slots. You secure the connection by either twisting the tab 90 degrees or folding it flat. Using glue is admitting you messed up the joint.
- Every Bend is Permanent. Wood is elastic. Metal has fatigue limits. Bend a piece once: it holds. Bend it twice: it weakens. Bend it three times: it snaps. Check the instructions twice before making any bend.
- The Pieces Are Sharp. Photo-etched metal is cut with lasers. Always handle pieces by the flat surfaces, not the edges. Keep bandages nearby.
The Toolkit: You Cannot Do This with Your Fingers.
Wooden kits can be built with just your hands. Metal kits require tools. Trying to assemble a metal model with your fingers is like trying to perform surgery with a butter knife.
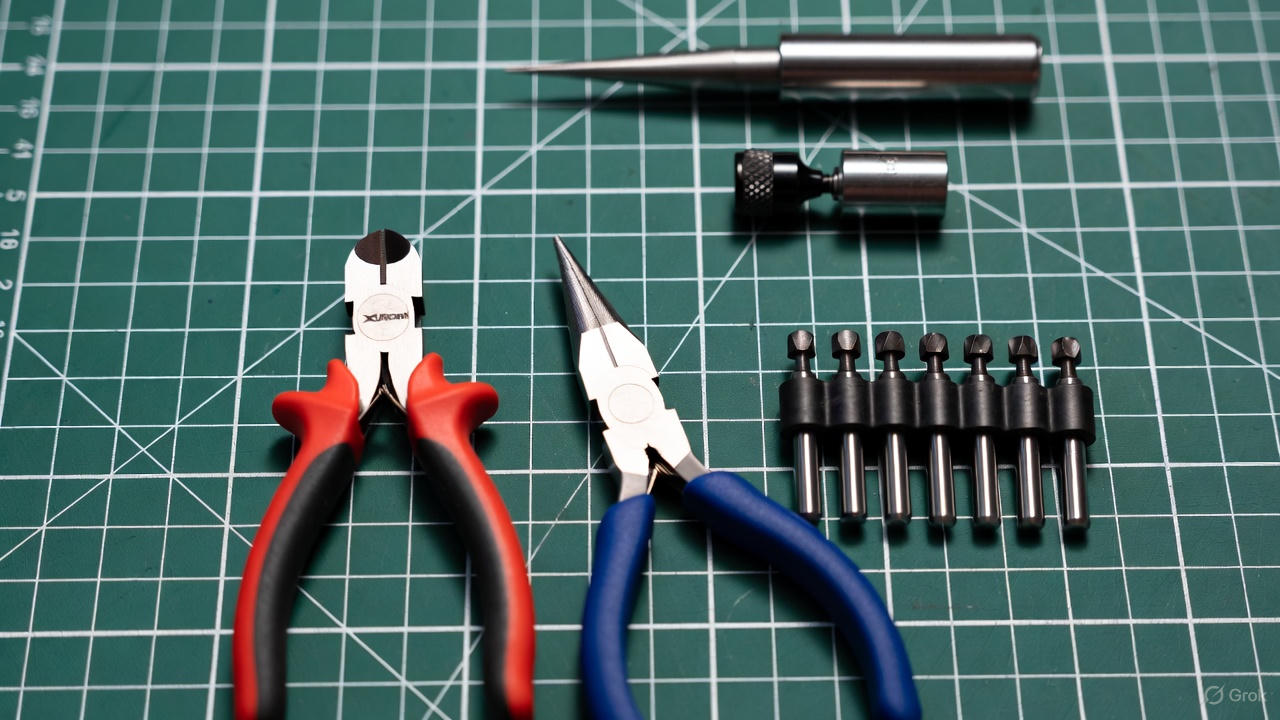
Tool 1: Flush Cutters (Mandatory)
- What to buy: Xuron 410 Micro-Shear Flush Cutters.
- Why: If you twist pieces off the sheet by hand, you'll leave sharp burrs. Flush cutters snip the piece free cleanly.
- Don't Do This: Don't use household scissors or wire cutters. They leave a pinch mark that creates sharp edges.
Tool 2: Needle Nose Pliers (Mandatory)
- Why: Your fingers cannot grip tiny metal tabs tightly enough to twist them. Pliers give you leverage.
- Pro Tip: If your pliers have serrated jaws, wrap the tips with masking tape to prevent scratching the polished metal.
Tool 3: Mandrels / Cylinders (The Secret Weapon)
- Why: You need to roll flat metal into perfect cylinders (like engine pistons or R2-D2's legs).
- What to use: I keep a set of cheap drill bits on my desk—not for drilling, but for rolling metal pieces around them. They are perfect for making different sizes of cylinders because they come in graduated sizes (3mm, 4mm, 5mm).
Technique 1: The Cut
Metal models come as flat sheets. Your first task is removing pieces cleanly.
- Identify: Match the number on the sheet to the instruction diagram.
- Support: Hold the sheet flat on a cutting mat.
- Cut: Place the flat side of the flush cutter against the piece you're keeping. Snip with one smooth motion.
Don't Do This: Never twist the piece off the sheet. It will warp the metal and leave a jagged edge that will cut you.
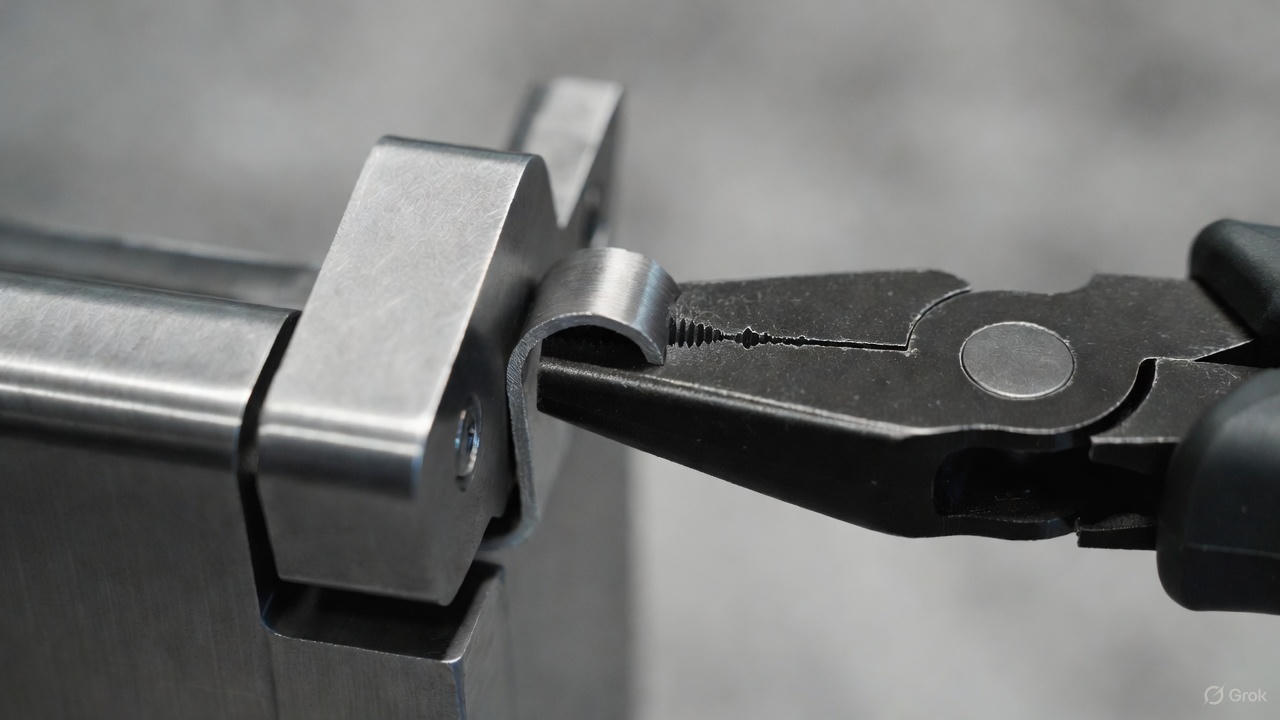
Technique 2: The Connection (Twist vs. Fold)
This is where beginners fail. Every connection is either a twist or a fold. The instructions use symbols to tell you which one.
○ Circle Symbol = TWIST
- What it means: Insert the tab, then twist it 90 degrees.
- Why: Twisting creates a mechanical lock. This is used for structural joints that bear weight.
- Common mistake: Twisting too far (180 degrees). This snaps the tab. One quarter turn (90 degrees) is perfect.
△ Triangle Symbol = FOLD
- What it means: Insert the tab, then fold it flat (180 degrees) against the surface.
- Why: Folding creates a low-profile joint. This is used for hidden connections or smooth exterior surfaces.
The "Check Twice" Rule: If you bend a tab the wrong way and try to straighten it, you're introducing micro-fractures. Bend it again, and it snaps. Verify the symbol (Circle vs Triangle) before you touch the pliers.
Technique 3: Shaping (Curves vs. Kinks)
Creating Smooth Curves The goal is to bend the metal gradually without creating a sharp crease.
- How: Hold the piece with both hands. Apply gentle, even pressure. Bend slowly—5-10 degrees at a time. Walk your fingers along the piece.
- Pro Tip: For long curves (like airplane wings), roll the metal over the edge of a table.
Creating Cylinders
- How: Lay the flat piece on your mat. Place your mandrel (drill bit or pen) at one edge. Slowly roll the metal around the mandrel.
- Pro Tip: If the metal won't stay curved, hold it tight around the mandrel for 10 seconds. Metal has "memory"—holding the shape helps it set.
What to Buy First: Beginner-Friendly Models
Not all models are equal. Some "Easy" models are actually nightmares.
Recommended:
- Metal Earth Golden Gate Bridge: Large pieces, simple folds. Very forgiving.
- Metal Earth Wright Brothers Airplane: Teaches basic cylinder rolling but has a low piece count.
- Piececool Desktop Crane: Good for learning how to build moving parts.
Avoid These (For Now):
- IconX Series: These are expert level.
- Castles: Repetitive and unforgiving.
- Dragons: Advanced shaping required.
Conclusion
Metal modeling is precision engineering. There's no glue to hide mistakes. Every bend is permanent.
That sounds intimidating, but it's also what makes it so rewarding. When you finish your first model—when you're holding that gleaming steel bridge in your hands—you'll understand. It catches the light. It feels substantial. You built it with pure craftsmanship.
Welcome to metal modeling. Now go snip something.
Read Also: The Best Glue for Miniature Houses (And Which Ones Ruin Your Kit
